Minecraft is one of the most popular games around the world. People of every age can play this game. It takes you to a fantasy world where you can create your 3D world. This game has a beautiful 3D screening and is filled with millions of devices that are discovered over time. These devices make these games a little bit heavier. This makes the game require more game memory especially when the game is updated. If you want to know how to add more RAM to your Minecraft game, then this article is for you. In this article, we will show you how to allocate more RAM to Minecraft. So let’s jump right into this article.
Does increasing memory help in Minecraft?
When Minecraft is updated, you get a lot of attractive features. It affects your memory especially if it is low. However, you can enjoy smooth graphics by increasing your RAM. Yes, the gaming experience becomes much better with the allocation of more RAM. People think it is difficult to increase memory in Minecraft, but it is not that much of a deal. Let us show you some of the best ways to add RAM in Minecraft.
How to allocate more RAM to Minecraft?
You can improve your system’s performance with this method. It was a complicated task to allocate more RAM in Minecraft manually, so Microsoft changed it to version 2.0.0. You can adjust the RAM in the Minecraft Launcher now and it does not require any risk of editing text files and corrupting the game.
Check RAM Memory
First of all, you should check your RAM memory. You can do this by pressing the Windows and Pause keys simultaneously. It lets you know how much memory can be allocated to Minecraft. You will have to install more RAM if there is not enough memory.
Step 1
First of all, make sure that you have the updated version of Minecraft.
Step 2
Go to Start > Settings > Systems > About and check the total RAM of your system.
Step 3
After that, double-tap on the Minecraft icon on your PC’s screen to open the Minecraft Launcher.
Step 4
Click on the Launch option.
Step 5
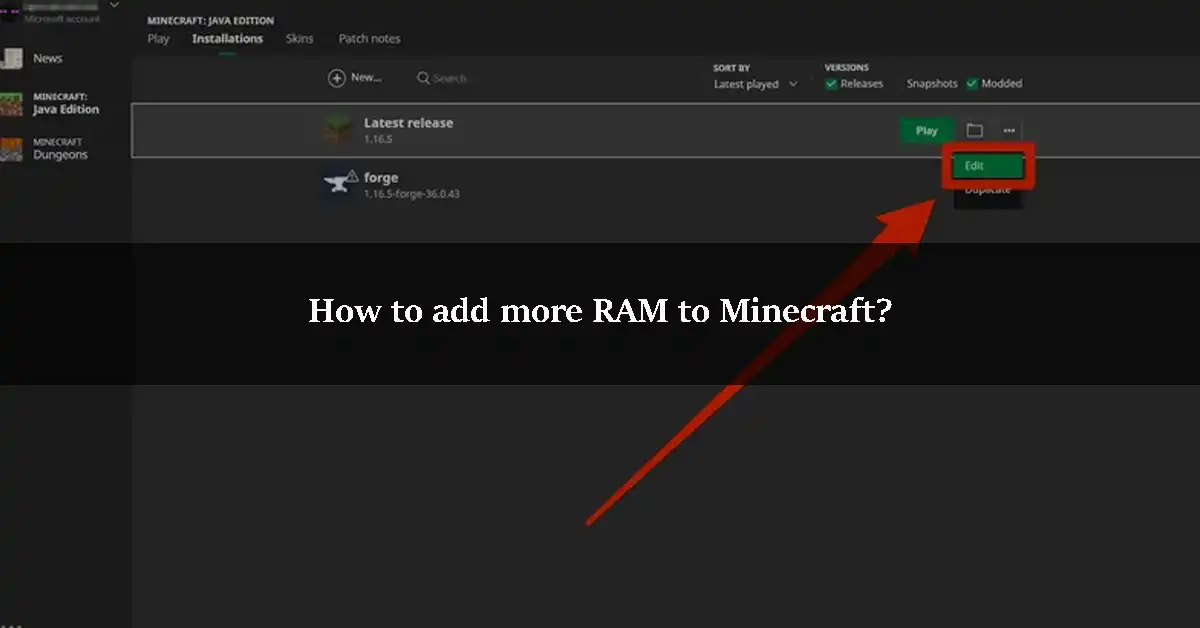
Make sure to enable the Advanced Settings on your desktop and choose the profile that you want to edit. If there is only one profile, then choose it.
Step 6
After that, toggle on the JVM logic switch.
Step 7
A line with the text -X1G will appear. Click on it to change the number of Gigabytes of RAM you want to add to Minecraft. You should not allow permission to Minecraft to use more than ⅔ of your overall RAM. Your PC will face lagging problems if you do this.
Step 8
Click on the Save button and save the changes. This method will allow Minecraft to use the other allocated RAM for gaming.
Method 2
The second way of adjusting the amount of RAM is a little different when hosted on a server. It is not a complicated task. Let us show you how to do it.
Step 1
Launch the Minecraft server and the folder that contains the Minecraft_server.exe file. Type Minecraft_server in the search bar if you can not find the directory.
Step 2
Click Home > New Items > Text Documents to create a new text document in the server directory.
Step 3
Paste the following in your text document:
java -Xmx####M -Xms####M -Exe Minecraft_Server.exe -o true Pause
Step 4
Replace the #### with the amount of memory you want to allocate in MBs. 1GB RAM contains 1024 MBs.
Step 5
After that, click on File > Save As… and change the save as to the type of all files. Then, change the extension from .txt to .bat.
Step 6
This will create a new launcher for your Minecraft server. Double-click on it to run. Use the .bat file to launch the Minecraft server. It will allocate the specified amount of RAM automatically.
We hope that this article helped you add more RAM to Minecraft. You can make your game performance better by using this technique. We have shown you two methods to add more RAM to Minecraft. If you have any queries about this article, then ask us freely in the comment section. We would love to help you.