How to fix the Attempted Switch from the DPC BSOD error in Windows 10?


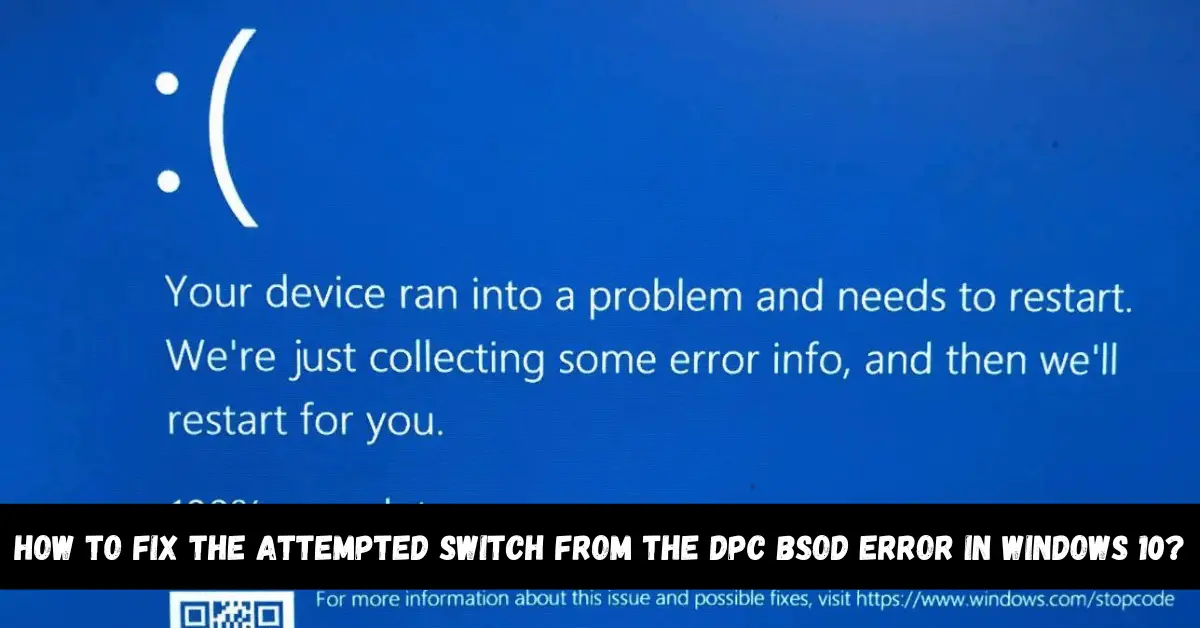
The Attempted Switch from DPC BSOD error mainly occurs when you turn off your PC during the initialization process of the operating system. If you are having this error on your PC, then this article is for you. In this article, we will help you fix the Attempted Switch from the DPC BSOD error. So let’s jump right into this article.
What is the Attempted Switch from the DPC BSOD error?
This error occurs mostly when you can accidentally shut down your PC during the initialization process for Windows Operating System. The prime cause of this error is Delayed Procedure Call ( DPC ) for attempting to carry out illegal operations.
The Delayed Procedure Call is enabled when the Kernel watches and calls the hang state to terminate or interrupt the software application. This means that the attachment process, the yield from the DPC, or the wait operation has taken place. Let us show you how to get rid of this issue.
Method 1: Update all of your drivers
When you do not update your PCs drivers for a long time, they start creating corrupt files and making other issues in the PC. You should update the drivers regularly so that you can prevent these types of errors. If the error occurs on important system equipment, then it can be very dangerous. Updating the drivers is not a difficult process at all. Let us show you how to do it.
Step 1
First of all, select the Start button from the bottom left corner of your screen and type Device Manager in the search bar.
Step 2
You will find it at the top of the searched results. Open it. ( If you have an older version on Windows, then use the Windows + R keys. It will open a dialog box. Type devmgmt.msc and hit enter.)
Step 3
Expand the sections according to the devices that you want to update. After that, right-click on it and select the Update Driver option.
Step 4
You can start Search for automatically updated software if Windows can find the new driver.
Step 5
If your PC was unable to find a new driver, then you can manually find the latest driver. You can do it using third-party apps.
Note:
The latest Windows updates get installed along with other Windows updates on Windows 10. Some drivers would not work with your computer’s operating system. In this case, you should make sure that your operating system is up to date. By default, Windows 10 updates apps automatically, but you can also do it manually. Let us show you how to update drivers manually.
Step 1
Hit the Windows + I key all together to open the settings of your PC. You can also click on the windows icon on the bottom left of your screen and go to settings.
Step 2
Expand the section related to the driver that you want to update. After that, right-click and click on the Update Driver option. Expand the mouse and other pointing device section and right-click on your touchpad or mouse to select the updated driver for mice and touchpads.
Step 3
Start searching for automatically updated driver software and check if Windows can find a new driver.
Step 4
Use third-party apps to update drivers if your Windows 10 PC could not find the latest driver.
Method 2: Run a memory test
Damaged memory or faulty software can cause this error. Check for a memory test to make sure it is not the reason fr this error. Let us show you how to run a memory test.
Step 1
Press the Windows key on your keyboard and type Memory Diagnostics in the search bar. Click on it.
Step 2
First, make sure that your work is saved and then restart your PC to check for issues.
Step 3
When the restart is completed, you will see that the Windows Memory Diagnostics tool works.
Step 4
Your PC will restart automatically and return to the Windows desktop. The test result will appear after you log in. If the results do not appear due to some reason, then check it manually.
Step 5
Press the Windows + R key altogether. It will open the Run dialog box. Type eventvwr.msc and press Enter.
Step 6
Click on System in the left pane under the Windows Logs section. Click on Find in the right pane.
Step 7
Type Memory Diagnostic in the search bar and hit Enter. The results will be shown at the bottom of the Window.
Step 8
If your memory confirmation results show that some drivers are working due to errors, then you have bad RAM and you should change your RAM. If nothing happens, then it means that your memory is good.
Method 3: Scan Disk
In this method, you have to make sure that the next time you boot your PC, it starts Disk checking. This process might take some time. Some computers even take days and more. If you do not want to scan it, then you can press any key you want to cancel it. Follow the instructions in the section below to scan the disk.
Step 1
Press the Windows + R key together on your keyboard and click on the Command Prompt ( Admin ).
Step 2
Click on Yes at the User Account Control Prompt window.
Step 3
It will display the command prompt again. Type chkdsk.exe /f /r.
Step 4
Hit the Enter key and press Y.
Method 4. Uninstall Mcafee Antivirus from your PC
You might have downloaded the Mcafee Antivirus tool to take care of viruses. But let us tell you that it is malware itself. This app can lead to a lot of errors, corrupt files, apps remaining on computers even after deleting them, etc. It is such a big issue that it can only be stopped by deleting the Mcafee antivirus. Follow the procedure in the section below to uninstall Mcafee from your Windows PC.
Step 1
Open the Mcafee antivirus tool on your PC. You can click on the Start menu and search for Control Panel or you can click on the gear-shaped icon to open settings.
Step 2
Adjust the view to the section in the upper right corner and click on Uninstall a program in the Programs section in the Control Panel.
Step 3
If you are using a configuration application in Windows 10, then if you click on the Applications option, it will open a list of all the programs and tools installed on your PC.
Step 4
Find the Mcafee Antivirus in the Control Panel and click on Uninstall or Remove.
Step 5
Make sure that all of the dialog boxes that Mcafee Antivirus installed should follow the instructions that appear in the Uninstallation Wizard.
Step 6
When the Mcafee antivirus is uninstalled, click on Finish and restart your computer for the changes to take action.
Now, you have to delete any remaining filed left by Mcafee. You can use the McAfee Consumer Product Removal Tool by following the instructions in the section below.
Step 1
First of all, go to the official McAfee website and download the MCPR tool.
Step 2
Open the MCPR.exe file that you downloaded. You can find it in the downloads section.
Step 3
Click Yes if you see a security UAC alert to select whether or not to allow the app to make changes to your PC. Press Continue or Run.
Step 4
Click on the Next button on the McAfee Software Removal screen and agree to the End User License Agreement.
Step 5
Type the security letter as shown on the Security Evaluation screen. Then, click on Next.
Step 6
When the removal process is complete, you will see the removal popup. It means that the McAfee products have been removed successfully from your computer.
Step 7
If there is a message saying that the cleanup failed or was unsuccessful, then restart your PC and do the whole procedure again.
Step 8
When the process is complete, restart your computer and check whether all files of McAfee were removed or not. Then check if the error is removed or not.
Method 5: Run a Virus Scan
Sometimes the DPC BSOD error occurs due to virus infection in the PC. If your computer has a virus, then that can not be good news. This virus can lead to a blue screen. The default feature in Windows 10 lets you run a full system scan of your PC. It uses the Microsoft Windows Defender. Let us show you how to use it.
Step 1
First of all, press the Windows key and search for the Update and Security option. Open it.
Step 2
Navigate to the Windows Defender and then open the Windows Defender Security Center.
Step 3
Click on the Virus & Threat Protection and Advanced Scan option.
Step 4
Choose Full Scan and click on Scan. Your computer will run a virus scan and let you know about it. You can delete it. See if the problem is solved by that. You can also use third-party anti-virus apps to detect and remove viruses from your computer.
Method 6: Scan the Windows Registry
The brain of a computer is the Windows Registry. Windows 10 displays issues when something goes wrong including the Attempted Switch from the DPC BSOD error. You should always scan and repair your registry. Let us show you how to do it.
Step 1
Download a Registry Repair tool from the internet and install it.
Step 2
Go to your registry and see if everything is alright.
Step 3
Click Scan for issues and click on Fix selected issue when the scan is completed.
Method 7: Clean or Uninstall Acronis
The original reason including the drivers that came with these devices were older versions of Acronis devices. This problem can be caused by a lot of tools. The main culprit seems to be the Acronis True Image Tool. First of all, you will have to disable the Acronis Startup Recovery Manager and get ready for the process that can be done by searching in the Start menu.
Click on the search result and Deactivate it. The Acronis Secure Zone tool associated with True Image should also be removed. The cleaning utility is not able to remove it. Go to the Manage Acronis Safe Zone from the Start menu and click on Remove from the Start tab. Let us show you the whole procedure.
Step 1
First of all, you have to download and install the Cleanup Utility tool. Go to the official website of this software to do that. When the download is complete, run its setup from the Downloads folder.
Step 2
The Command Prompt window will appear and you will have to wait until you determine your PC’s Operating System. A message will be displayed at the bottom of the screen to ensure that you select the Continue with Uninstallation option. You can do this by clicking on the 2nd key on your keyboard before pressing the Enter key.
Step 3
You will see another prompt that will ask you to uninstall all Acronis products from your computer system. Click on the Y key on your keyboard and hit Enter again. Explore on your computer. You will be asked to complete the X process and verify the Y button.
Step 4
You will reach the last prompt. It will ask you to restart your computer to complete the uninstallation process. Click on the N key on your keyboard in that case and hit Enter.
Step 5
After that, open the Registry Editor window and type regedit in the search bar next to the Start button. You can also press the Windows + R key to open the Run dialog box and type it. Go to the following key in your registry by going to the left pane:
HKEY_LOCAL_MACHINE \ SYSTEM \ CurrentControlSet \ Control \ Class \ D 4D36E967-E325-11CE-BFC1-08002BE10318
Step 6
Click on this key and try to find upper filters and lower filters keys that you have to edit. Find them on the right side of your window. Look or TDRPiman *, Snapman *, Flat, SRV, or Time counter strings as a part of the data value under the Data column.
Step 7
If those values are available, then right-click on the upper or lower filters that have those strings in the registry entries and choose the Edit option from the context menu.
Step 8
Select the problematic string ( TDRPiman *, Snapman *, Flat, SRV, or Time counter ) in the Edit window under the Value Data section. Delete it with the Delete or Backspace button on your keyboard.
Step 9
Now, you have to do the same procedure for the registry key in the section below:
HKEY_LOCAL_MACHINE Y SYSTEM \ CurrentControlSet \ Control \ Class \ {71A27CDD-812A-11D0-BEC7-08002BE2092F
Step 10
At last, restart your computer by clicking on the Start menu, then opening the Power option, and clicking on Restart. You can also press alt + F4 to restart your computer. When the computer starts again, check whether the problem is gone or not.
Method 8: Reinstall the latest update of Windows ( For Windows 10 users only )
When Windows 10 users saw this BSOD error, they went crazy. They thought that the new update would fix all bugs and issues and not create new ones. If your Windows is lagging in updates, then you might have installed this wrong update policy. You can remove this problem by uninstalling reinstalling this update. The latest Windows update has fixed this bug.
Step 1
Go to the Start menu and search for Control Panel and open it. You can also go to the gear-shaped icon named Settings.
Step 2
Switch to the section on the upper right corner view of the Control Panel. After that, click on Uninstall program under the Programs section. You will see the option to install updates. Click on it.
Step 3
If you are using the Settings option, then go to the Windows Update tab by selecting the Update & Security option. Scroll down and click on the Update History view option.
Step 4
You will see a new screen that will have the uninstall updates option. Click on it.
Step 5
You will see a list of installed updates for your computer either way. After that, check the MS windows section for the updates that affect your operating system to throw a BSOD error.
Step 6
Scroll to the left and look at the installed column. It will display the date of the installation of the update. Make sure to uninstall the newest one.
Step 7
Click on the update once and select the uninstall option above and follow the on-screen instructions to remove the update.
Step 8
Then, go back to the Settings option and then go to the Update & Security section. Click on the Windows update tab and check the updates button to check for the update you just installed.
Step 9
You will have to wait till Windows finds, downloads, and installs it after restarting it. Then, check if the BSOD error is gone or not.
Conclusion
We hope that this article helped you fix the Attempted Switch from the DPC BSOD error in Windows 10. We explained all details of this topic in the upper section. You can see eight different methods to get rid of this error. All of them are explained in detail. If you still have any confusion, then you can let us know in the comment section. We would love to help you. Let us know if you liked this article.


Leave a Reply